Flask-Session deep dive
Posted on Thu 14 September 2023 in Flask
The Flask-Session extension manages Flask application user session data. It can use a variety of session interfaces to store the user data on the local PC or on a server, enabling you to store large amounts of user data per session with a single browser cookie.
In this post, I test the Flask-Session extension to see if it is suitable for an application I am developing. While working with Flask-Session, I solved some frustrating issues that I think some readers who are writing similar programs will want to know about. This post will explain how session data persistance works for three session types: FileSystem, SQLAlchemy, and Redis. It will also document the special steps required to make Flask-Session work with the SQLAlchemy session type.
Create a simple program that uses the FileSystem backend
Create a simple Flask application that uses the Flask-Session extension with the FileSystem backend. This backend caches session data in a local directory and is useful for testing and for evaluating Flask-Session without also setting up a database server.
The Flask application will consist of a single application file, named app.py, and several Jinja template files that create the application's HTML web pages. It will use an SQL database to manage user data associated with each user's session. I want users to remain anonymous so I don't use the Flask-Login extension and do not implement Login and Logout buttons in my application. Instead, I want to automatically delete the user data after an anonymous user stops using the application for a specified period of time.
Set up Python environment
Prepare a Python virtual environment for this project. I will place my application and the virtual environment in a directory named experiment.
$ mkdir experiment
$ cd experiment
$ python3 -m venv .venv
$ source .venv/bin/activate
(.venv) $
Install Flask and Flask-Session.
(.venv) $ pip install flask
(.venv) $ pip install Flask-Session
Create basic Flask templates
Create a base template and two page templates that display different pages: a greetings page that gathers some user data, and an action page that displays that data back to the user.
Create a templates directory for the templates:
(.venv) $ mkdir templates
Base template
Create a file named base.html:
(.venv) $ nano templates/base.html
Enter the following text
<!doctype html>
<html lang="en">
    <head>
    {% block head %}
        <meta charset="utf-8">
        <meta name='viewport' content='width=device-width, initial-scale=1'>
        <title>{% block title %}Experiment{% endblock %}</title>
    {% endblock %}
    </head>
    <body>
        {% block content %}{% endblock %}
    </body>
</html>
Save the file.
Greeting template
Create a file named greeting.html:
(.venv) $ nano templates/greeting.html
Enter the following text
{% extends "base.html" %}
{% block title %}Experimental Greeting{% endblock %}
{% block content %}
    <h1>Upload text file</h1>
    <form method='POST' enctype="multipart/form-data">
        <input type='file' name='textfile'>
        <input type='submit' value='Upload'>
    </form>
    {% if session.file_contents %}
        <p>Thank you for uploading a file. See the contents of your previous upload <a href="{{ url_for('action') }}">here</a> or upload a new file.</p>
    {% else %}
        <p>This is an experiment. Upload the text file whose contents you want displayed. Or, go to the <a href="{{ url_for('action') }}">Action page</a></p> to see what happens.
    {% endif %}
{% endblock %}
Save the file.
Action template
Create a file named action.html:
(.venv) $ nano templates/action.html
Enter the following text
{% extends "base.html" %}
{% block title %}This is what you asked for!{% endblock %}
{% block content %}
<h2>Go back to the <a href="{{ url_for('greeting') }}">upload page</a>.</h2>
<br>
<h3>The file contents are:</h3>
<br>
{% if session.file_contents %}
{% for item in session.file_contents %}
{{ item|replace(' ',' '|safe) }}<br>
{% endfor %}
{% else %}
<p>You have not yet uploaded a file</p>
{% endif %}
{% endblock %}
Save the file.
Create the Flask application
Edit a file named app.py:
(.venv) $ nano app.py
At the top of the app.py file, import the following classes and functions from Flask and Flask-Session:
from flask import Flask, request, redirect, url_for, render_template, session
from flask_session import Session
Instantiate the Flask application object. In this case, we will follow convention and call it app.
app = Flask(__name__)
To configure the Flask application, set the usual Flask environment variables, SECRET_KEY, FLASK_APP, and FLASK_ENV.
for the Flask app and for the sessions to be created:
app.config["SECRET_KEY"] = "xyzxyxyz"
app.config["FLASK_APP"] = "app"
app.config["FLASK_ENV"] = "Development"
Then set the Flask-Session environment variables. Set the SESSION_TYPE to filesystem because it is the simplest backend to set up and so it is a good backend with which to start experimenting.
Flask-Session will start cleaning up old files from the directory after more than 500 files are stored there. You can change this threshold by setting the SESSION_FILE_THRESHOLD variable. I set it to a small value to make testing easier.
app.config["SESSION_TYPE"] = "filesystem"
app.config["SESSION_FILE_THRESHOLD"] = 5
Call Flask-Session's Session class and pass the Flask application object into it. This adds configurations to the application's session object.
Session(app)
Create the Flask route for the index page that contains the file upload form, which I call the greeting route.
@app.route("/", methods=('GET','POST'))
def greeting():
    if request.method == 'POST':
        file = request.files['textfile']
        if file:
            lines = [x.decode('UTF-8') for x in file.readlines()]
            session['file_contents'] = lines
            return redirect (url_for('action'))
    return render_template('greeting.html')
I used the Flask request.files property to get the object named "textfile" (whose name was defined in the Jinja template greeting.html) when the form is submitted, which generates a POST request.
Flask uploads the file as a byte stream. The file's readlines() method outputs a list of rows but each row is a binary string. I need to convert each row in the list from bytes to UTF-8 character code points. The list comprehension in the greeting route, above, creates a new list named "lines" that contains the same rows but each row is now a UTF-8 string.
Create the Flask route for the page that displays the uploaded file, which I call the action route.
@app.route("/action", methods=('GET','POST'))
def action():
    return render_template('action.html')
This simply renders the action.html Jinja2 template, which contains the code that checks if there is any user data in the session['file_contents'] object and, if so, prints it on the page.
Save the file.
Note that I am not checking for valid inputs or ensuring that the file is really a text file. I am keeping this code very simple so I can quickly demonstrate the way Flask-Session works. So, when testing, use small text files.
Test the application
Test that the application will request a text file and then display the contents of the file in the browser. Run the app:
(.venv) $ pwd
/home/brian/Projects/experiment
(.venv) $ flask run
Open a browser and enter in the URL where the Flask server is running:
http://localhost:5000
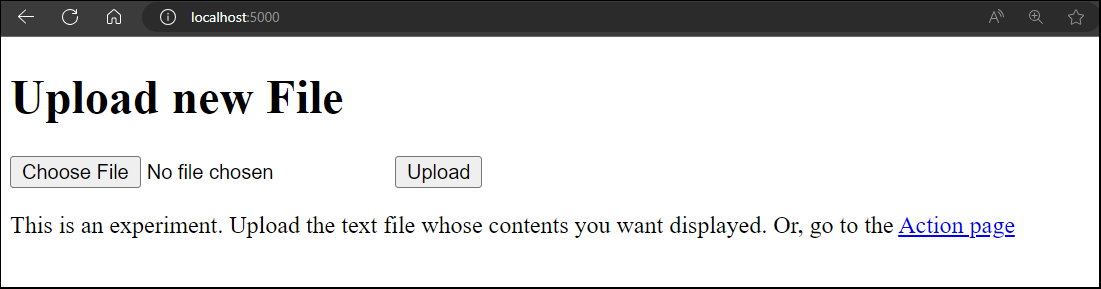
The index, or greeting, page of the application will look like the following:
Create a dummy text file, add some dummy text to it, and save it. Select the file using the web app and click the Upload button. The action page should look similar to the screenshot below:

You should expect that the program will create a new directory and store user data as files in that directory. The session file should be saved in a directory, created by Flask-Session, named flask_session. It will be in the same location as the app.py file. If you want, you can define another directory by setting the SESSION_FILE_DIR variable.
(.venv) $ ls flask_session
2029240f6d1128be89ddc32729463129
This shows a session saved on the server. There should also be a session cookie in your browser that corresponds with the server-side session file. The file names are created by encrypting the Session UUID so you can't easily match which cache file is associated with which browser session.
If you delete the session cookie using your browser's development tools, and then try to upload a text file again, you will see that the new session creates a new file in the flask_session directory. For example:
(.venv) $ ls -1 flask_session
2029240f6d1128be89ddc32729463129
394ee48c85cd86a3e1391102c3ce25d3
FileSystem session configuration variables
I found the Flask-Session documentation did not describe how its configuration variables affect your program's operation. I describe in more detail the variables that interact with each other to affect how many sessions are cached and for how long. Other variables set the default storage directory, cookies and session names, and are described well enough in the Flask-Session configuration documentation.
SESSION_FILE_THRESHOLD
The SESSION_FILE_THRESHOLD variable controls the number of session data files cached in the flask_session directory. The default is value is 500. Depending on your application you may need more or less. For testing, I usually set a small number, like five. No files are deleted until the configured threshold is met, not even files older than the PERMANENT_SESSION_LIFETIME. When the threshold is met, all files older than the PERMANENT_SESSION_LIFETIME are deleted, even if that makes the number of files in the directory much lower than SESSION_FILE_THRESHOLD.
If many files are generated quickly so that the threshold is reached before any file is older than PERMANENT_SESSION_LIFETIME, Flask-Session will still maintain the threshold and delete session files until there are only SESSION_FILE_THRESHOLD remaining.
PERMANENT_SESSION_LIFETIME
The PERMANENT_SESSION_LIFETIME variable controls the length of time a session will last before Flask-Session deletes it. It has a default value of 2,592,000 seconds or 30 days. You may set it to a smaller or larger number of seconds. It is used to calculate the session expiry in cookies and is used to select which session files on the server will be deleted when the number of files exceeds SESSION_FILE_THRESHOLD. It can be used even if you are creating non-permanent sessions, as described below.
SESSION_PERMANENT
The SESSION_PERMANENT variable controls the type of cookie created in the browser and has only an indirect affect on how files are stored on the server, because of the way Flask-Session reacts to cookies in the browser.
If SESSION_PERMANENT is true, the cookie sets its Expires/Max-Age to its default value of the current time plus 30 days or to the current time plus PERMANENT_SESSION_LIFETIME variable, if it was also configured. When you use the web app again to upload a new file after PERMANENT_SESSION_LIFETIME, you create a new cookie with a new session UUID and a new cache file in the flask_session directory.
If SESSION_PERMANENT is false, the cookie sets its Expires/Max-Age to the string, "session". In theory this is a temporary cookie that should be deleted when the session ends but many browsers keep session cookies indefinitely. However, the PERMANENT_SESSION_LIFETIME variable still has an impact on sessions even if SESSION_PERMANENT is false. Flask-Session deletes the session after PERMANENT_SESSION_LIFETIME when you try to re-use it. But, since the session cookie still exists on the browser, it re-uses its Session UUID and creates a new session file on the server with the same filename as the previous session data. The result is that is seems as though no new session file was added.
Using the SQLAlchemy backend
The FileSystemSessionInterface backend is useful for for trying Flask-Session for the first time and may be good for local testing but you need to use a database if you intend to deploy your application as a web app. Flask-Session has an SQL database backend called SqlAlchemySessionInterface, which requires the Flask-SQLAlchemy extension.
Install Flask-SQLAlchemy and the Postgres Python driver in your Python virtual environment.
(.venv) $ pip install flask-sqlalchemy
(.venv) $ pip install psycopg2
Set up the database server
The easiest way to start a database server for testing is to use Docker. In this example, I will create a Docker container that is running a PostgreSQL database. You may run the commands listed below and, if you wish, you may see more details about running a PostgreSQL database in a Docker container in my previous post.
Use the official PostgreSQL Docker image from the Docker Hub container library. Create a new database container named userdb from the Postgres image. Set the admin password and define a user. Setting the user also creates a database with the same name as the user. In this case, I created a user named userdata. Run the Docker run command:
(.venv) $ docker run \
    --detach \
    --env POSTGRES_PASSWORD=abcd1234 \
    --env POSTGRES_USER=userdata \
    --publish 5432:5432 \
    --name userdb\
    postgres
Use the Docker exec command to run the psql utility on the container to check that the database server is running. Start it in interactive mode on the container. Use the username, userdata, which connects to the database, userdata:
(.venv) $ docker exec -it userdb \
    psql --username userdata

sessions=#
Now you can be confident that the database is ready to use. Quit the psql utility:
sessions=# \q
(.venv) $
You also know the database information that is required to create the database connection string in your Flask application. The database is running on TCP port 5432 at your PC's loopback address, which can be expressed either as 127.0.0.1 or localhost. You know the username and password and the database name.
Modify your program to use the SQL database
Edit the app.py program so it uses a database backend instead of the local filesystem. Open the file in your favorite text editor.
(.venv) $ nano app.py
Add the following code under the existing import section to assign the database connection string to a variable named uri:
uri = "postgresql://userdata:abcd1234@localhost:5432/userdata"
Change the Flask-Session configuration variables.
- You must set the SESSION_PERMANENT variable to be True or the database will generate type errors.
- Assign the string "sqlalchemy" to the SESSION_TYPE variable.
- Assign the connection string from the uri variable to the SQLALCHEMY_DATABASE_URI variable.
- Configure PERMANENT_SESSION_LIFETIME to a low value like 60 seconds for testing purposes
- Normally, you don't need to set the PERMANENT_SESSION_LIFETIME variable because Flask-Session will not delete old rows in the database. However, I plan to add some code to fix that in a later step, so .
The result will look like the code listed below:
app.config["SESSION_PERMANENT"] = True
app.config["SESSION_TYPE"] = "sqlalchemy"
app.config["SQLALCHEMY_DATABASE_URI"] = uri
app.config["PERMANENT_SESSION_LIFETIME"] = 60  # 1 minute
Add the following code after you initialize the Session class. This code is a workaround that is not well documented. The Flask-Session SqlAlchemySessionInterface does not create the database when you initialze the Session. I consider this to be a bug in Flask-Session.
Session(app)
with app.app_context():
    app.session_interface.db.create_all()
In the code above, you need to use the with app.app_context() block to manually make the Flask app's application context available to the app.session_interface.db.create_all() function. Flask normally manages the application context for you but, in this case, we are manually initializing the database outside of a Flask route or view.
In the end, the entire app.py program will look like below:
from flask import Flask, redirect, url_for, render_template, session, request
from flask_session import Session

uri = "postgresql://userdata:abcd1234@localhost:5432/userdata"

app = Flask(__name__)
app.config["SECRET_KEY"] = "xyzxyxyz"
app.config["FLASK_APP"] = "app"
app.config["FLASK_ENV"] = "Development"
app.config["SESSION_PERMANENT"] = True
app.config["SESSION_TYPE"] = "sqlalchemy"
app.config["SQLALCHEMY_DATABASE_URI"] = uri
app.config["PERMANENT_SESSION_LIFETIME"] = 60  # 1 minute

Session(app)
with app.app_context():
    app.session_interface.db.create_all()

@app.route("/", methods=('GET','POST'))
def greeting():
    if request.method == 'POST':
        file = request.files['textfile']
        if file:
            lines = [x.decode('UTF-8') for x in file.readlines()]
            session['file_contents'] = lines
            return redirect (url_for('action'))
    return render_template('greeting.html')

@app.route("/action", methods=('GET','POST'))
def action():
    return render_template('action.html')
You can see how easy it was to change to a database backend. Except for the workaround required to create the database, we just changed a few variables. You could change the session type back to filesystem just as easily.
Test the program
To test the modified program, run it with the flask run command and then open a browser to the URL: http://localhost:5000. The application looks and works the same as it did when we used the filesystem backend. Only, now, it is using a database to cache session data.
Using your browser's development tools, delete the session cookie (or wait one minute), and upload the text file again. Now you should have two rows in the database. Check the contents of the database by starting psql in the database container:
(.venv) $ docker exec -it userdb \
    psql --username userdata

sessions=#
Read rows in the sessions table in the database. By default, Flask-Sessions creates the table named sessions to store the session data. You may select your own table name if you configure the SESSION_SQLALCHEMY_TABLE variable in the program.
userdata=# SELECT id, session_id, expiry FROM sessions;
 id |                  session_id                  |           expiry
----+----------------------------------------------+----------------------------
  1 | session:84c64ee0-69e8-4e05-a6b4-ed18a9ef3719 | 2023-09-13 02:18:12.278563
  2 | session:24c8b4a0-52b1-4e53-b5ae-e44daf4629f5 | 2023-09-13 02:18:28.17735
(2 rows)
You can see that the expiry time is set 60 seconds in the future. Check the database time using the now() SQL function:
userdata=# SELECT now();
              now
-------------------------------
 2023-09-13 02:17:35.826363+00
(1 row)
However, Flask-Session does not clean up the database rows after their expiry time passes. Flask-Session expects you to manually remove user data when the session ends. The only way for your program to know that is if a user clicks on a Logout button or something similar. Your Flask program cannot detect when a user just closes their browser. So, a lot of rows could potentially build up as people use your application.
Solving the data cleanup problem
In my opinion, Flask-Session should take care of cleaning up old rows in the database. However, it does not.
According to the Flask-Session source code, it only deletes backend session data for a specific session if you try to re-open it after it has expired. But, this ignores the case of "orphaned" session data. There is a three-year-old pull request on Flask-Session's GitHub site waiting to be accepted that would probably solve this issue. I'll comment more about Flask-Session's slow development process later in this post.
To solve this problem, I added more workaround code to the app.py program. I integrated the code from the Flask-Session pull request #117 into my greeting route. The code will run when a new file is uploaded and check all the rows in the database. If the datetime in the expiry column in any row is later than the database's current time, it deletes that row.
Open app.py in your text editor and make the following changes. First, import the datetime function from the Python datetime module:
from datetime import datetime
Then, add the following code in the greeting route where it will run when a new file is uploaded.
# clean up old sessions
db_model = app.session_interface.sql_session_model
db_model.query.filter(db_model.expiry < datetime.utcnow()).delete()
app.session_interface.db.session.commit()
When you are done, the greeting route should look similar to below:
@app.route("/", methods=('GET','POST'))
def greeting():
    if request.method == 'POST':
        file = request.files['textfile']
        if file:
            lines = [x.decode('UTF-8') for x in file.readlines()]
            session['file_contents'] = lines

            # clean up old sessions
            db_model = app.session_interface.sql_session_model
            db_model.query.filter(db_model.expiry < datetime.utcnow()).delete()
            app.session_interface.db.session.commit()

            return redirect (url_for('action'))
    return render_template('greeting.html')
Save the file. Now, when you test the program, you will find that any row in the sessions table that has a datetime in its expiry column older than the database's current time will be cleaned up.
This solution might cause a performance issue if your web app becomes a popular service. If many users are adding files to the database so the program has to search through and clean up many database rows each time a user uploads a file, that user will have to wait until the that code finishes executing before seeing the result of her upload. However, this is not an issue with low usage.
An alternative solution: custom SQL functions
There is another way to handle the data cleanup problem that will probably avoid the performance hit. You can create an SQL function in the database that is either triggered periodically, or every time you insert a new row in the database. I think this would have less impact on application performance because the data cleanup is not happening on the same process as the web app.
The function would check the expiry column in each row against the current time and delete any rows where the current time is later than the datetime in the row's expiry column. See The Art of Web Blog for a good description of this solution function.
Triggering the function is more complex. I would prefer to run the function periodically, like once per day. But there is no easy way to create a periodic trigger in PostgreSQL. Other SQL databases may offer ways to trigger a function periodically. The solution I referenced above triggers the function every time a table is updated, which could cause a lot of load on the database server if a web app is popular.
Most solutions like this would use a Linux cron job to trigger the SQL function periodically. You would define the function in the database using the SQL programming language and set up the cron job by modifying the crontab file on a Linux server. This requires that you set up the database before you run your program and means you need to manage the database model using three different technologies: Linux, SQL, and Python. But, it also means you do not need to further change your program to make it work well with an SQL database.
SQL Session configuration variables
Only the PERMANENT_SESSION_LIFETIME variable affects how many sessions are cached in the SQL database and for how long. Other variables set the SQL database connection string and table name, and are described well enough in the Flask-Session configuration documentation.
PERMANENT_SESSION_LIFETIME
The PERMANENT_SESSION_LIFETIME variable determines the datetime value placed in a new or updated session row's expiry column and in the Browser session cookie's Expires/Max-Age field. Currently, Flask-Session does nothing else with this information so, unless you add the workarounds described above, PERMANENT_SESSION_LIFETIME has no affect on how Flask-Session works.
If you set a very small value for PERMANENT_SESSION_LIFETIME, like 30 seconds, then you can end up with many new rows added to the database while testing your application. Because the browser's cookie will expire after PERMANENT_SESSION_LIFETIME, a new session will be created. So, a low value can result in a lot of database rows containing "orphaned" session data.
SESSION_PERMANENT
The SESSION_PERMANENT variable must be set to True
If SESSION_PERMANENT is True, Flask-Session places a datetime value of the current time plus 30 days or to the current time plus PERMANENT_SESSION_LIFETIME in the database row's expiry column. It also sets the same expiration time in the Expires/Max-Age field in your browser cookie.
If SESSION_PERMANENT is False, Flask-Session places a value None in the database row's expiry column, which is not a valid data type for that column. This immediately causes an exception. So, SESSION_PERMANENT must be set to True
Using the Redis backend
If you do not have to use an SQL database, you may try the Redis database. Redis works well with Flask-Session because it is easy to set up and it comes with a built-in ability to clean up old database rows after their expiry date is passed. Most blog posts about Flask-Session use the Redis database in their examples.
Install the Redis Python driver in your Python virtual environment.
(.venv) $ pip install redis
Set up the database
Again, it is easiest to use Docker to run a database server on your PC. In this example, I will create a Docker container that is running a Redis database server.
Use the official Redis Docker image from the Docker Hub container library. When using Redis for testing, you don't have to define any environment variables. Run the Docker run command:
(.venv) $ docker run --name redis_db -d -p 6379:6379 redis
Use the Docker exec command to run the redis-cli utility on the container to check that the Redis database server is running. Start it in interactive mode on the container.
(.venv) $  docker exec -it redis_db redis-cli
127.0.0.1:6379>
Run some Redis commands to see that the server is responding:
127.0.0.1:6379> keys *
(empty array)
127.0.0.1:6379> time
1) "1694617027"
2) "144270"
127.0.0.1:6379>
Now you can be confident that the Redis database is ready to use. Quit the redis-cli utility:
127.0.0.1:6379> quit
(.venv) $
Modify your program to use the Redis database
Edit the app.py program so it uses a Redis database backend instead of the SQL database backend. Open the file in your favorite text editor and add the following code in the existing import section:
Import the Redis driver:
import redis
Delete the old SQL connection string.
Change the Flask-Session configuration variables.
- Assign the string "redis" to the SESSION_TYPE variable.
- Configure the SESSION_REDIS variable. The Redis connection parameters can be left blank when calling the Redis class in the redis driver because it defaults to *http://localhost:6379
- Set the SESSION_PERMANENT to either True or False depending on how you want cookie expiration to behave.
- Configure PERMANENT_SESSION_LIFETIME to a low value like 60 seconds for testing purposes.
The result will look like the code listed below:
app.config["SESSION_TYPE"] = "redis"
app.config["SESSION_REDIS"] = redis.Redis()
app.config["SESSION_PERMANENT"] = True
app.config["PERMANENT_SESSION_LIFETIME"] = 60  # 1 minute
Also, delete the workaround code you created for the SQL database in the previous section. Redis "just works" with Flask-Session so you don't need workarounds.
In the end, the entire app.py program will look like below:
from flask import Flask, redirect, url_for, render_template, session, request
from flask_session import Session
import redis

app = Flask(__name__)

app.config["SECRET_KEY"] = "xyzxyxyz"
app.config["FLASK_APP"] = "app"
app.config["FLASK_ENV"] = "Development"
app.config["SESSION_PERMANENT"] = True
app.config["SESSION_TYPE"] = "redis"
app.config["SESSION_REDIS"] = redis.Redis()
app.config["PERMANENT_SESSION_LIFETIME"] = 60

Session(app)

@app.route("/", methods=('GET','POST'))
def greeting():
    if request.method == 'POST':
        file = request.files['textfile']
        if file:
            lines = [x.decode('UTF-8') for x in file.readlines()]
            session['file_contents'] = lines
            return redirect (url_for('action'))
    return render_template('greeting.html')

@app.route("/action", methods=('GET','POST'))
def action():
    return render_template('action.html')
You can see how easy it was to change to a database backend, again.
Test the program
To test the modified program, run it with the flask run command and then open a browser to the URL: http://localhost:5000. The application looks and works the same as it did when we used the SQL database backend. Only, now, it is using a Redis database to cache session data.
Using your browser's development tools, delete the session cookie and upload the text file again. Do this several times within one minute (which is your configured expiry time). You should have several rows in the database. Check the contents of the database by starting redis-cli in the database container:
(.venv) $  docker exec -it redis_db redis-cli
127.0.0.1:6379>
Run the Redis key command to see that the server has user session data:
127.0.0.1:6379> keys *
1) "session:f44482e5-de8e-4d4d-a1c9-dcf08277957f"
2) "session:7c9c235e-77e7-48d3-bdec-5bb182bfb918"
You can see how much time, in seconds, a key has remaining with the Redis TTL command:
127.0.0.1:6379> ttl "session:f44482e5-de8e-4d4d-a1c9-dcf08277957f"
(integer) 14
To test the automatic data cleanup function in Redis, wait 60 seconds and see that the Redis user data has been automatically deleted
127.0.0.1:6379> keys *
(empty array)
Redis session configuration variables
The PERMANENT_SESSION_LIFETIME variable affects how long session data is cached. The SESSION_PERMANENT variable determines how Browser cookies are handled. The other variable sets the Redis database instance and is described well enough in the Flask-Session configuration documentation.
PERMANENT_SESSION_LIFETIME
The PERMANENT_SESSION_LIFETIME variable controls the length of time a session will last before Redis deletes its associated user data. It has a default value of 2,592,000 seconds or 30 days. You may set it to a smaller or larger number of seconds. It is also used to calculate the session expiry in cookies if SESSION_PERMANENT is True.
SESSION_PERMANENT
The SESSION_PERMANENT variable controls the type of cookie created in the browser and has only an indirect affect on how data is stored on the server. Data is assigned a TTL on the server using the PERMANENT_SESSION_LIFETIME regardless of whether SESSION_PERMANENT is set to True or False.
If SESSION_PERMANENT is True, the Browser cookie sets its Expires/Max-Age to its default value of the current time plus 30 days or to the current time plus PERMANENT_SESSION_LIFETIME variable, if it was also configured. When you use the web app again to upload a new file after PERMANENT_SESSION_LIFETIME, you create a new cookie with a new session UUID and a new entry in the Redis database.
If SESSION_PERMANENT is False, the cookie sets its Expires/Max-Age to "session". In theory this is a temporary cookie that should be deleted when the session ends but many browsers keep session cookies indefinitely. However, the PERMANENT_SESSION_LIFETIME variable still has an impact on sessions even if SESSION_PERMANENT is False. Redis will still delete the server data when the TTL expires so, when you try to re-use the session, you will not have any data. After you upload a file again, Flask session creates a new entry in the Redis DB but it has the same key as the deleted session data, because it reuses the session name from the browser cookie.
Conclusion
I believe I have filled in a documentation gap about the way Flask-Session handles data persistence for three of its session types: filesystem, sqlalchemy, and redis. This was an "itch I had to scratch" once I realized that Flask-Session was not doing what I inferred should happen, given the configuration variable values. The Flask-Session documentation is clear, but sparse. It does not describe how session data persists on the backend or how configuration variables can change that behavior.
As I stated before, I wrote this post while evaluating if Flask-Session would be suitable for my use-case and I have concluded that I will not use Flask-Session for the program on which I am currently working. I want to use an SQL database because I am learning about SQL, and my project is meant to support my learning. However, Flask-Session does not work the way I want when I use an SQL database as the backend. I had to add extra code to work around the issues.
Also, I like to work with projects that are more active in accepting inputs from users. The Flask-Session project on GitHub seems to have a very slow development cycle. Updates are very infrequent. There are many issues and pull requests that have been left open for years. If I write my own code to implement functionality similar to what Flask-Session provides, I can make changes to the way my program handles sessions without waiting for the Flask-Session team to review a pull request.
However, there are many cases where Flask-Session will work, especially in more classic applications that manage users via the Flask-Login extension. Flask-Session works well for anonymous users if you use the Redis database backend.