Set up GitHub Copilot agents in VSCode
Posted on Mon 01 December 2025 in Machine Learning
Most developers already know that AI agents can help them develop code faster by learning about a project and making context-aware suggestions. However, it can be intimidating to get started because there are so many options available and ways to work.
In this post, I will walk through how to set up GitHub Copilot agents in VSCode and focus on using agents to understand and improve an existing project. I will discuss the essential configuration steps that protect your data and create custom agents tailored to understand and use your project's specific frameworks and conventions.
GitHub Copilot
I like GitHub Copilot because:
- It offers the agentic AI features that support code and documentation analysis.
- The price is reasonable: US$10 per user, per month and we can cancel any time
- It offers access to a wide variety of models, including models from ChatGPT, Google, Grok, and Anthropic.
- Microsoft offers strong, business-friendly features like protection of data and privacy, code copy detection, and IP indemnification.
I understand that the biggest concern about using cloud-based AI tools tools is the risk of exposing your data to unknown parties. Another risk of using AI tools, in general, is the risk that some of the outputs may contain copyrighted code.
The professional level of GitHub Copilot does not use enterprise data for model training. This protection extends to every AI model available via Github Copilot Pro. Github also ensures user data is private and does not retain user data on its servers after 28 days.
Github Copilot Pro provide features that greatly reduce the risk of unintentionally generating copyrighted code. Github Copilot Pro offers a Code Duplication Detection feature that prevents generation of copyrighted code.
Github Copilot settings
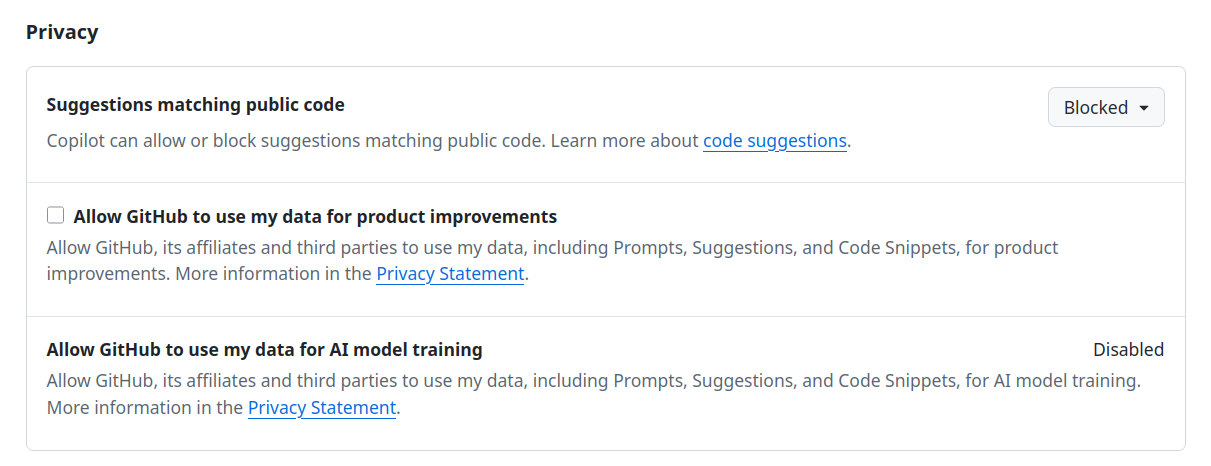
Before you use GitHub Copilot Pro, verify that it is configured to protect your data. The "Allow GitHub to use my data for AI model training" setting should be "Disabled".
You must also disable the "Allow GitHub to use my data for product improvements" setting and I recommend that you block "Suggestions matching public code".
Log into your GitHub account on the GitHub web site at https://github.com, and then click on your profile in the upper right corner of the web page. Select "Copilot Settings". Scroll to the bottom of the settings page and verify the "block public code", "use my data", and "allow training" settings are disabled, as shown below.
Set up GitHub Copilot in VSCode
When getting started with AI agents, I suggest you work with code locally on your computer. This means you need to set up GitHub Copilot in your text editor, or you may install and use the GitHub Copilot command-line-interface on your PC. This post focuses on using GitHub Copilot with the VSCode text editor.
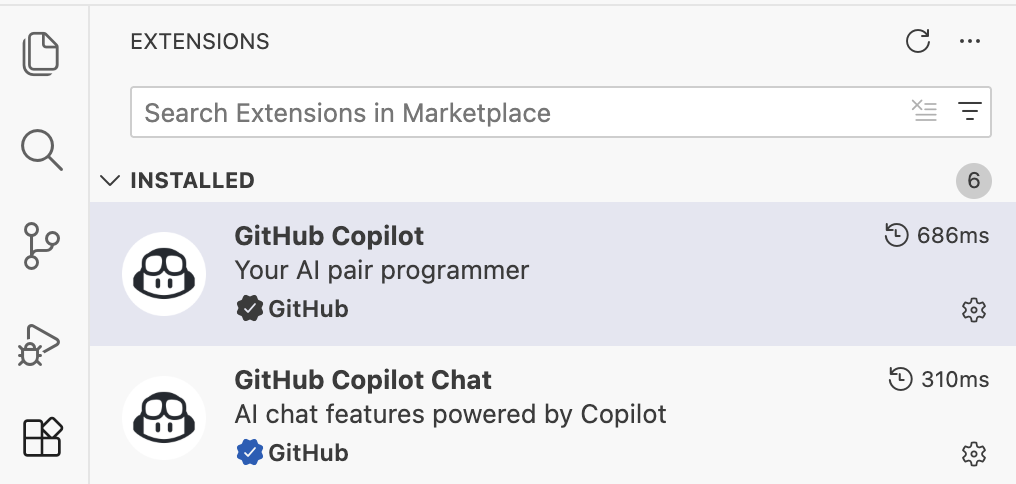
There are two GitHub Copilot extensions in the VSCode extensions marketplace. Installing one of them seems to automatically install both. The results in your extensions panel should look like:
Using Git with GitHub Copilot
GitHub Copilot works with any Git system, so you do not need to host your code on GitHub. You can use other systems like GitLab or BitBucket. In this post, I focus only on working with local files, on your computer so I do not use the GitHub-specific features supported by Copilot, such as GitHub's coding agent or GitHub Spaces.
Working with Git and local files, and pushing to your remote repository only when you are satisfied with everything the Copilot agent has done, greatly limits the "blast radius" of any major errors. You can roll back changes made by the agent easily in your local files.
I know a lot of enthusiasts talk about using AI to support the entire coding workflow, including pull requests. But, when getting started with AI agents, it's best to focus on the project code while manually managing your development process. You can pick up more automations later as you get more confortable with AI agents and Copilot.
Get the code from your remote repository
I assume you already have a project you want an AI agent to help you with.
Clone your project code from its remote repository hosted on GitHub, or from any other repository service, to a folder on your PC. As an example, I am using a Python project I created a year ago that support music festival organizers.
cd ~ mkdir Projects
cd Projects
git clone https://github.com/blinklet/music-festival-organizer.git
Open your project in VSCode
After cloning all the repository to your computer, open it in VSCode as follows:
- In VSCode, go to File --> Open Folder...
- Navigate to the repository folder (which is music-festival-organizer in this example)
- Click Open
All subfolders in the repository folder will appear in VSCode's side bar. Verify that VSCode is managing these in a git repository:
- Click on the Source Control icon in the activity bar
- You should see a list of repositories. Select one of them.
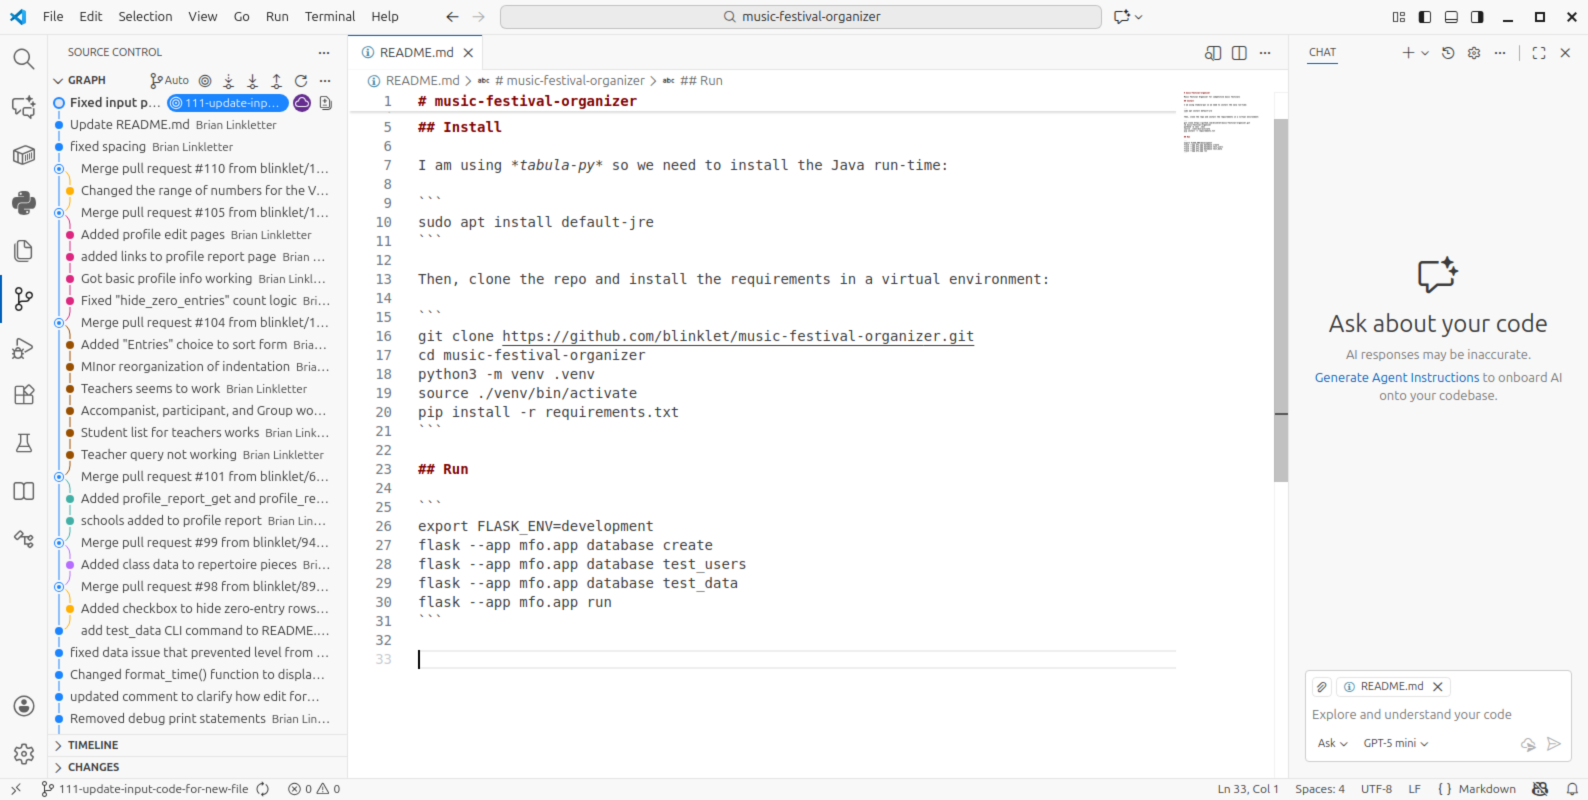
- Click on the Graph panel in the Source Control side bar
Now you should see the git history of the repository. To see what has been changed in each commit, select the commit tag then click on the filenames that were part of the commit. You'll see the diff showing the changes. See the screenshot below.
Check the .gitignore file
I'll need to create a Python virtual environment in the repository folder to support any AI agents I create (they like to write their own helper scripts in Python). So that the Python files don't get managed by Git, copy the text from the Python.gitignore file available on GitHub and append it to your local .gitignore file (It's too long to display here). Save the file.
In VSCode's Source Control side panel, add the .gitignore file to the main branch and commit the change. Now you can track changes to the file, if an agent changes it.
GitHub Copilot Chat
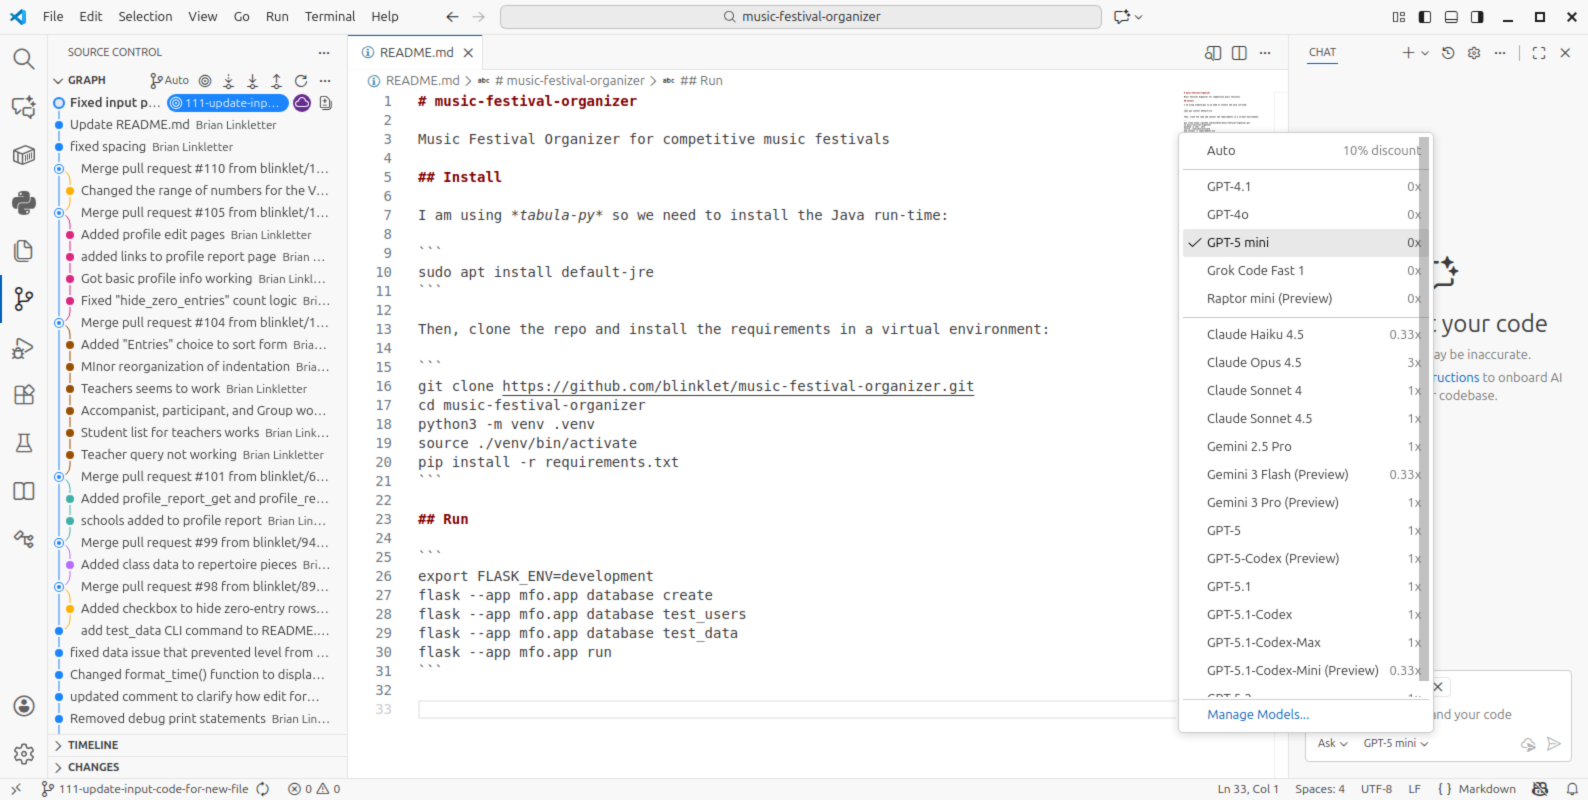
To get started, use GitHib Copilot chat. Select one of the models that has a "zero" multiplier so that your chat does not use up any of your limited number of premium requests. In this example, I will use GPT5-mini.
To select the model, select it from the drop-down menu at the bottom of the chat bar, as shown below:
I fooled around for a bit. I eventually decided that the zero-multiplier models were not giving me the results I wanted. I was more satisfied by the models that use "premium requests".
Generate Copilot instructions
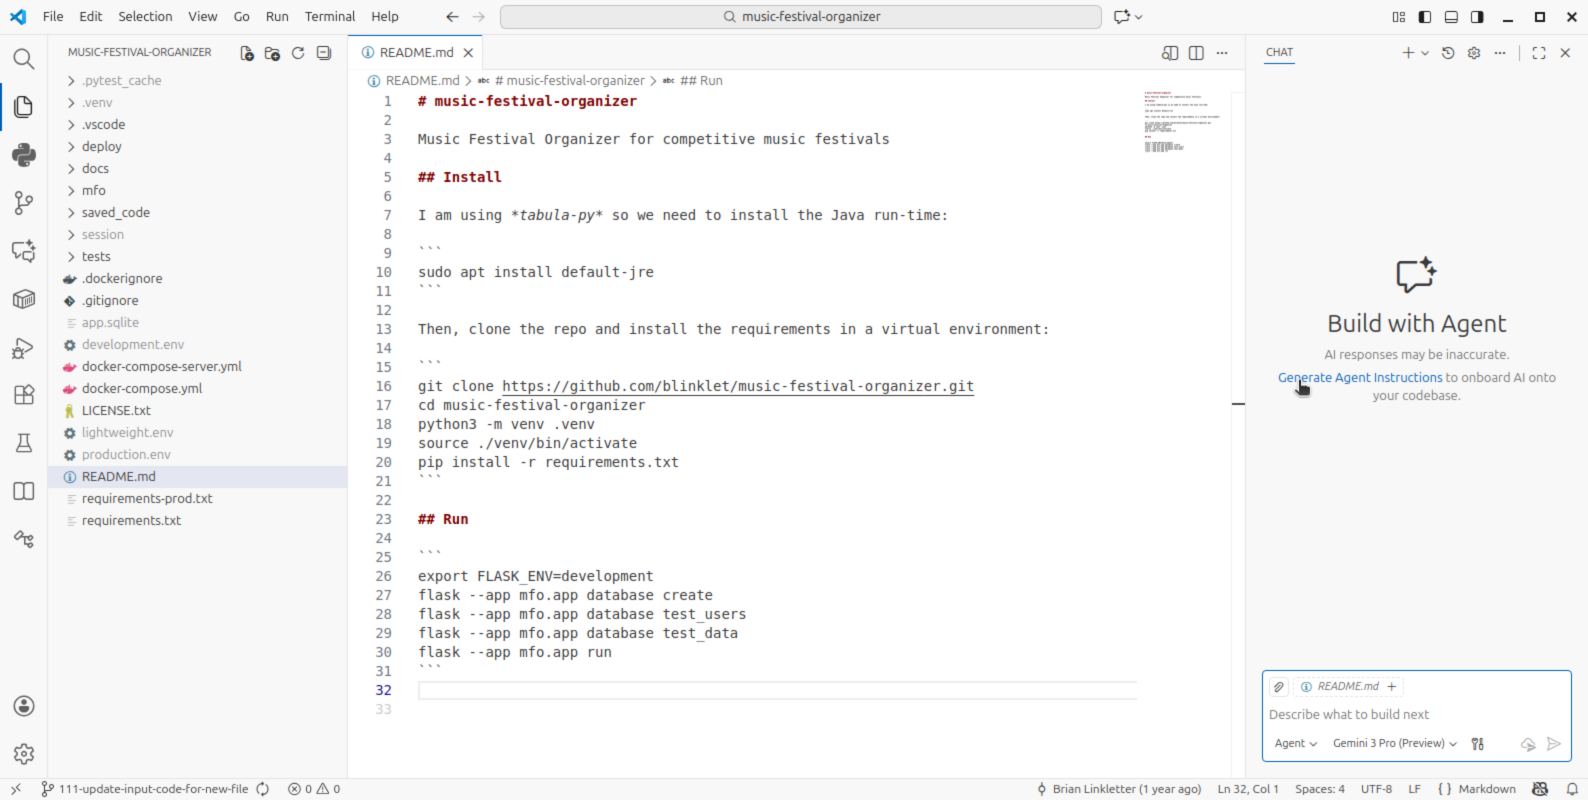
Click on the "new Chat" icon at the top of the chat panel. It looks like a Plus sign. This creates a new chat panel that displays a link to "Generate Agent Instructions".
Change the agent from "Ask" to "Agent". Change the AI model to "Gemini Pro", and then click on the "Generate Agent Instructions" instructions link.
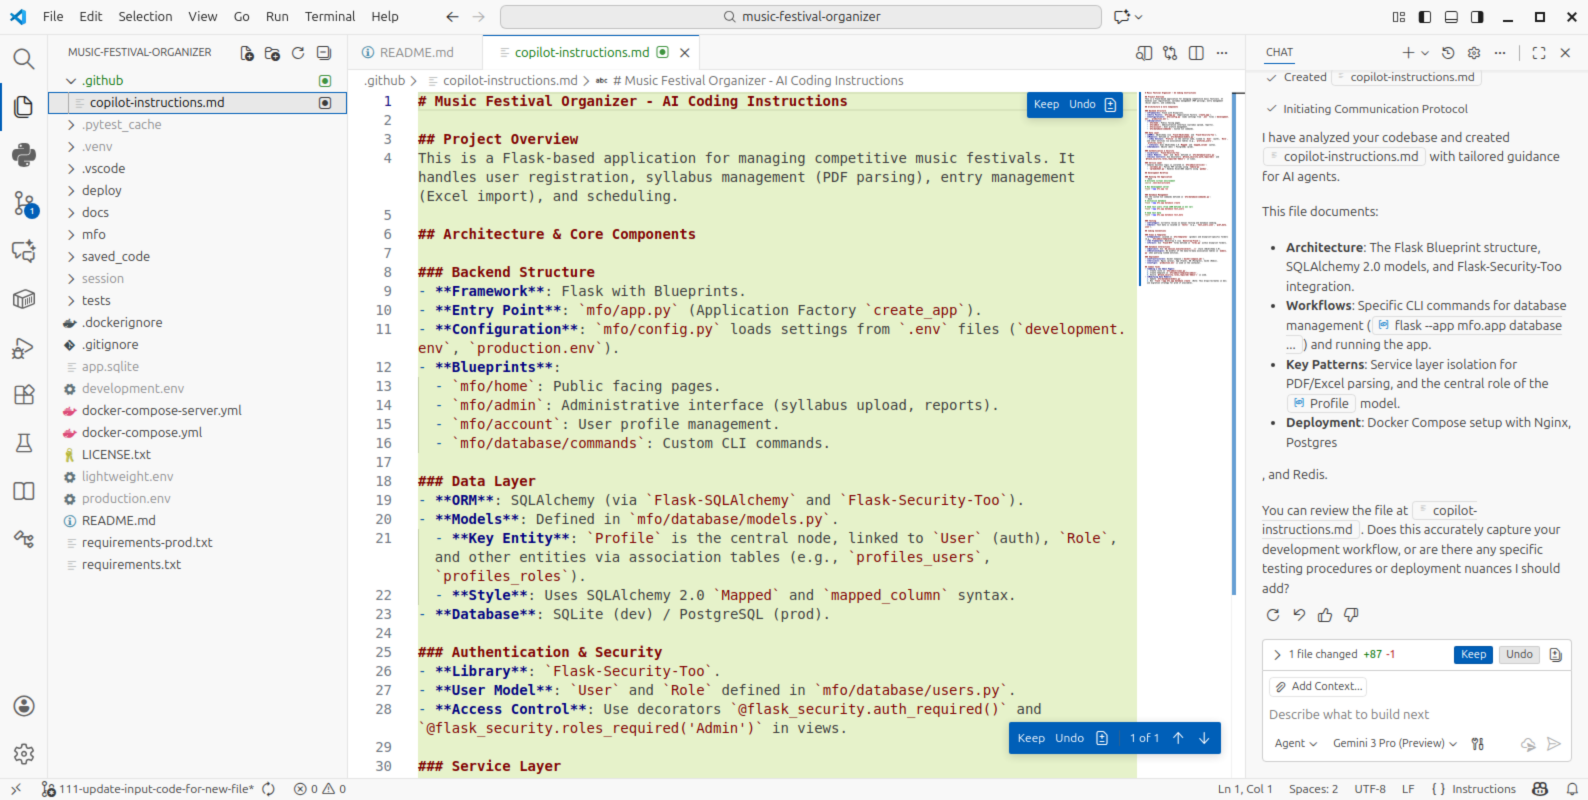
The new agent will create a hidden folder named .github and create an instructions file named copilot-instructions.md that contains information about your project that future agents can use as context.
You can keep the changes to the file, undo the changes, or edit the suggested changes. Then, save the file.
The copilot-instructions.md file is a living document and you should update it as you learn more about the code, or to guide development in the way you prefer.
Terminology
VSCode used some confusing terms earlier. If you need to create similar instructions for another repo you might use the command pallet and select Chat:Generate Workspace Instructions File. This is the same thing as the "Generate Agent Instructions" instructions link in a new chat panel in VSCode.
Create Copilot agents in VSCode
The GitHub Copilot user documentation is a good place to learn about creating and using agents. See also the Awesome-Copilot repo for examples of agent files. Github has a page that describes how to do specification-driven development.
Each user will have their own needs. In my case, I want an expert in Python who will use specific frameworks to continue development of this project. So, I will create my own custom agent tailored to my needs.
Different ML models produce different results. For example, Claude Sonnet 4.5 creates very long, detailed files while Google Gemini 3 Pro creates shorter files. When creating an agent, I found shorter files with less direction work better. Long detailed agent descriptions seem to restrict the output generated and you start to see a lot of text in responses that is just copied from the agent description. So, I used Google Gemini 3 Pro to help me create my agent.
I selected the "Gemini 3 Pro" model in "Agent" mode and told it to do the following:
Propose an python-web.agent.md file that creates an agent who can effectively
program in this project, using the most up-to-date versions of the frameworks
used, but is free to also propose the use of other frameworks, if they better
suit the perceived requirements.
This produced a file .github/agents/python-web.agent.md file that describes the behaviour of a Python co-programming agent, tuned to the needs of my project. It wasn't perfect, so I had to add a few lines, but it was a great starting point for building an agent.
Now, the new Python-web agent appears in VSCode's agents list, as seen in the screenshot, below.

Using the agent
Now that the agent is configured with specific knowledge of my project's stack (Flask, SQLAlchemy 2.0, etc.) and goals (to use HTMX, Pydantic, etc.), we can give it high-level tasks and ask it to write code that matches the project's requirements.
Some example scenarios:
- I wrote this project a year ago so I can ask the python-web agent to explain the structure of the project to me and to suggest improvements.
- The python-web agent was instructed to use SQLAlchemy 2.0 syntax and to use the modern select statements instead of the older query statement. We can use this to refactor legacy code or write new, compliant queries.
- The python-web agent knows I want to avoid complex JavaScript frameworks in favour of HTMX. So I can ask it to add dynamic features and it will avoid generating JavaScript code that I cannot understand.
- The python-web agent is encouraged to use Pydantic for data validation, so I could ask it to improve my spreadsheet import logic.
- I could ask the agent to create tests for the application using Pytest.
The agent is empowered to change files in your local project. You can use Git commands to "go back" to unmodified versions of files if changes don't work out. Learing to use Git commands well will help you work with agents because you will find it easier to track the changes agents make and to roll back specific changes as needed.
Creating new agents
It's sometimes helpful to start a new activity with a new context so that previous request and inputs do not cause the agent to generate outputs based on old information. Sometimes its helpful to "start fresh", while other times the chat history provides useful context. It's up to you.
Create a new chat by clicking on the "new Chat" icon at the top of the chat panel. Manage agents and rejoin old chats by clicking on the "Show Chats" icon in the top of the chat panel.
Conclusion
I covered the basics of setting up and using AI agents that help you understand and improve the code in an existing project.