Use SQLAlchemy to write data to a database table
Posted on Mon 16 October 2023 in Python
In this post, I study how to use Python and the SQLAlchemy ORM to write data to a database and read it back.
In some of my previous posts, I already described how to use SQLAlchemy to read data from an existing relational database. If you have never used the SQLAlchemy ORM before, I suggest you read those posts, first.
I will create a simple SQLite database that contains just one table with three columns. Then, I will add rows containing data to the database table, read data from the table, modify data in existing rows, and delete rows from the table.
Create the environment
As always, we need a Python virtual environment so we can install dependencies in an isolated environment. I created a project directory and a new Python virtual environment. Then, I installed SQLAlchemy in the virtual environment.
$ python3 -m venv .venv
$ source .venv/bin/activate
(.venv) $ pip install sqlalchemy
One may, optionally, install and run Jupyter Notebooks so they can more easily follow this excercise. Or one may use the standard Python REPL. I will use a Jupyter Notebook.
(.venv) $ pip install jupyterlab
(.venv) $ jupyter-lab
The Jupyter Notebook will open in a browser window.
Create a database
I will create and use an SQLite database because SQLite is already built into Python. Readers may use any database they wish. They will just have to replace the database connection string in my examples below with their own database connection string.
Create a connection
First, I created a connection to a database.
SQLAlchemy's create_engine() function generates an instance of the Engine class, configured with the information in the connection string. The connection string tells the Engine which database driver to use, the database location, and its authentication information.
In the Jupyter Notebook cell (or the Python REPL), I entered and ran the following code:
from sqlalchemy import create_engine

connection_string = "sqlite:///userdata.db"
engine = create_engine(connection_string)
The Engine instance, which I named engine, does not immediately create a connection to the database. It will create a connection when it is asked to perform a database transaction.
For example, after running the above code, the database file named userdata.db is not yet created in the project folder1.
Declare database table information
There are two ways to create database metadata in my Python program: database reflection, or declarative mapping.
I covered reflection extensively in my previous post about using SQLAlchemy to read data so I won't cover it here. I am starting with a new, empty database so reflection does not apply in this case, anyway.
I will use SQLAlchemy Declarative Mapping to manually define SQL database tables as Python classes. The SQLAlchemy documentation recommends that one use Declarative Mapping in all cases to manually build SQLAlchemy ORM classes that match the database structure that either exists or is to be defined. The code that results from the Declarative Mapping process documents the database structure and allows one to more easily handle changes to database structures in the future.
I used the SQLAlchemy ORM's DeclarativeBase class to perform declarative mapping. The standard practice is to first create a class called Base that is a subclass of the DeclarativeBase class. The new Base class has a metadata attribute that stores database table metadata2.
I entered the following code and ran it:
from sqlalchemy.orm import DeclarativeBase

class Base(DeclarativeBase):
    pass
Next, I created a class that defines a table. This new class is a subclass of the Base class I created earlier. I don't need to include an __init__() method in the class definition because SQLAlchemy creates a default __init__() method for subclasses of the DeclarativeBase class, which is good enough in this case.
I created a class named Userdata and defined its __tablename__ attribute so the table in the database will be called userdata. Then, I created three new attributes that map the table columns:
- user_id: a user name, which is a string and will serve as the table's primary key and must be unique in each row,
- user_data: a longer string containing user data, and
- time_stamp: a time stamp recorded in the standard datetime format.
Each attribute is generated using the mapped_column() function3, which takes parameters that define the column's data type and relationships. The attribute name defines the column name.
from sqlalchemy import String, DateTime, func
from sqlalchemy.orm import mapped_column

class Userdata(Base):
    __tablename__ = "userdata"
    user_id = mapped_column(String(32), primary_key=True, nullable=False)
    user_data = mapped_column(String(640))
    time_stamp = mapped_column(DateTime(), default=func.now(), onupdate=func.now())
In the time_stamp column, I configured the parameters default and onupdate to run an SQL function so that the SQL server will create the datetime entry if no value is passed to the date_time parameter when a row is added or updated. Other programmers might choose to generate a time stamp using the Python datetime module and write it to the database when adding or updating a row. Either method is OK. I just wanted to demonstrate using SQL database functions.
The Userdata class I defined above is an ORM Mapped Class. It, and any other ORM mapped classes I create, define the database tables and relationships. Every time I run this code in the future, this class sets up the Python objects that will interact with the table and columns in the database.
Database metadata
When I create a new class, like Userdata, that is based on the Base class, information I defined in the class is also registered in the Base class's metadata collection. The SQLAlchemy developers used some advanced object-oriented programming techniques to accomplish this, but new users of SQLAlchemy don't need to worry about how this is done. Just know that one can get all table metadata from the Base.metadata.tables attribute, even though that information was originally defined in other classes.
For example:
print(Base.metadata.tables)
Shows metadata that describes the userdata table:
FacadeDict({'userdata': Table('userdata', MetaData(), Column('user_id', String(length=32), table=<userdata>, primary_key=True, nullable=False), Column('user_data', String(length=640), table=<userdata>), Column('time_stamp', DateTime(), table=<userdata>, onupdate=ColumnElementColumnDefault(<sqlalchemy.sql.functions.now at 0x1511eb1d2d0; now>), default=ColumnElementColumnDefault(<sqlalchemy.sql.functions.now at 0x1511eb1d4d0; now>)), schema=None)})
If I had defined other tables, they would have appeared in the same output, along with the userdata table.
Connect to the database
I am running this code for the first time, so I must create the database. All ORM mapped classes that inherit from Base are registered in its metadata4, so use the Base class to create all the tables in the database. The Base object's metadata.create_all() method will use the metadata to create the database structure.
I pass the database engine instance as a parameter to the create_all() method so it can connect to the database and, if the tables do not yet exist, run the transactions that create them.
Base.metadata.create_all(engine)
At this point, SQLAlchemy will connect to the database defined by the engine instance and send SQL statements that create a table named userdata. Since I am using SQLite, a database file named userdata.db gets created in the project folder.
If the database already exists, SQLAlchemy detects it and does not alter the existing database. Instead, it will try to map the metadata defined in the QLAlchemy ORM's Base class to the existing database schema. If the ORM Mapped Classes I created did not match the the existing database schema, SQLAlchemy would have raised an exception. I do not cover how to modify existing database schema in this post. To learn more about that, read about SQLAlchemy database migration.
Write data to a database table
Now, I want to write some data to the database, using the unit-of-work pattern recommended in the ORM documentation.
Start a session
To create database transactions, I first create a database session, which will manage the database transactions. One way to do that is to create an instance of the SQLAlcemy ORM's Session class and bind it to the engine instance I created earlier.
from sqlalchemy.orm import Session

session = Session(engine)
There are multiple ways to create and use sessions. The SQLAlchemy documentation describes different ways to use sessions and many blog posts are available that describe how to create efficient database transactions. I will cover a few methods in this post, starting with the simplest, shown above.
Write some records
To add rows to the userdata table in the database, add instances of the Userdata class to the SQLAlchemy session and set the values of the class attributes representing each column. For example, to add a row where the user_id is "Brad", and the user_data is "Brad's data", with a time stamp recording when the row was added, run the following code:
from datetime import datetime
user = Userdata(user_id="Brad", user_data="Brad's data")
session.add(user)
One can add more records to the database using the same method: create another Userdata instance and add it to the session object. For example:
user = Userdata(user_id="Larry", user_data="Data for Larry")
session.add(user)
user = Userdata(user_id="Jane", user_data="More data")
session.add(user)
Write records in bulk
The SQLAlchemy ORM also provides an insert() function that supports bulk inserts. while I prefer to use session.add() to add individual items to a database table, there are cases where I may want to build a list of items to add to the database and execute all the inserts in the list. For example: to add in several more rows to the database, run the following code:
from sqlalchemy import insert

add_list = [{"user_id": "Barbra", "user_data": "Data for Barbra"},
            {"user_id": "Jessa", "user_data": "Jessas data"},
            {"user_id": "Ed", "user_data": "Ed has lots of data"}]

session.execute(insert(Userdata), add_list)
Data persistence
At this point, I have a database transaction that has been started but not completed. No permanent records have been created in the database; the data exists in the session object, only.
I found that it is helpful to use another database viewer tool to look at how and when my Python code actually writes data in the database so I used the SQLite Viewer Web App. I opened a web browser and navigated to: https://sqliteviewer.app/. Then I used the app to open the userdata.db file in my project directory.
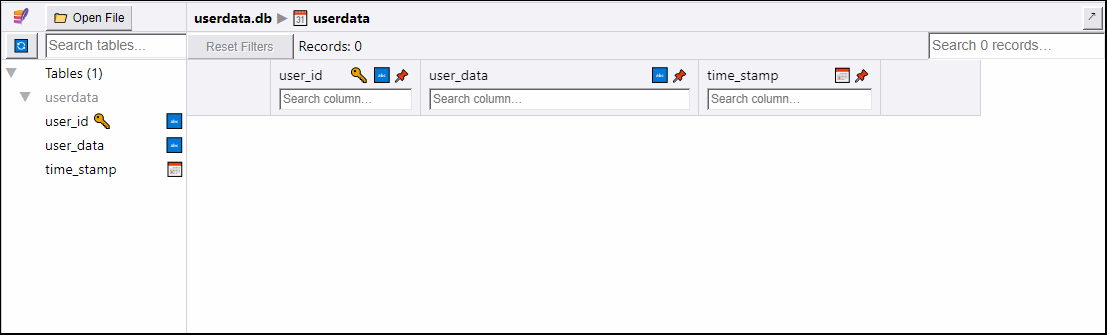
I saw that the userdata table was still empty. I have added data to the session but have not yet written it to persistent storage in the database table. However, I can still access the data I added to the session using the SQLAlchemy select function, even though it is not yet written to the database. For example:
from sqlalchemy import select

stmt = select(Userdata)
results = session.execute(stmt).scalars()
for x in results:
    print(x.user_id, x.user_data, x.time_stamp)
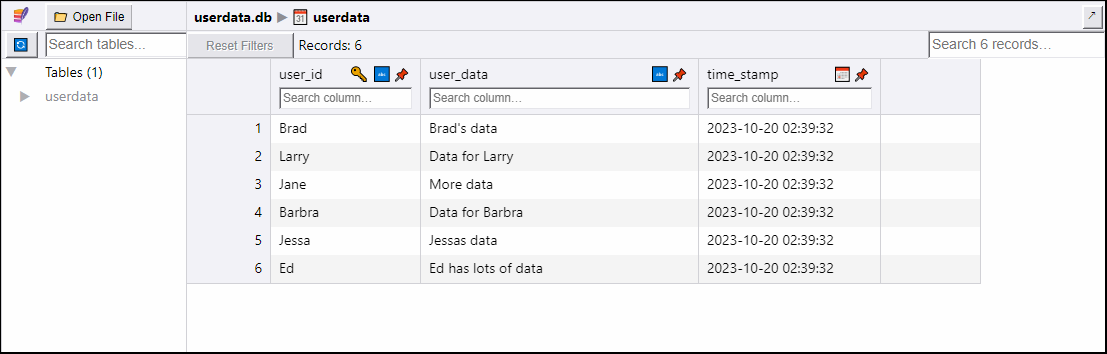
The code shown above prints the data stored in the six records I added to the session. SQLAlchemy acts like they are stored in the database when they are actually just stored in the open transaction.
Brad Brad's data 2023-10-20 02:39:32
Larry Data for Larry 2023-10-20 02:39:32
Jane More data 2023-10-20 02:39:32
Barbra Data for Barbra 2023-10-20 02:39:32
Jessa Jessas data 2023-10-20 02:39:32
Ed Ed has lots of data 2023-10-20 02:39:32
At this point, I can continue to add records, or modify the attributes of existing records. I can even discard all additions and changes in the transaction using the session's rollback() method.
After I have completed all tasks associated with the current transaction, I can commit the changes to the database using the SQLAlchemy session's commit() method, as shown below:
session.commit()
The commit() method sends one SQL INSERT command for each Userdata instance added to the session, followed by an SQL COMMIT command.
NOTE: I don't discuss the The SQLAlchemy session's flush() method in this post, but readers will need to know about it when they create more complex database relationships and transactions. For now, just know that the commit() method runs the flush() method before it commits data. And, the select() method runs the flush() method before it builds a select statement, which is why the time_stamp column has a value set to the time I ran the select() method.
Now, when I look at the SQLite Viewer web app, I see six rows in the userdata table:
Close the session
I can continue to use the existing database session for other transactions or I can close it. The SQLAlchemy documentation offers advice on when one should close a session.
I can still use closed sessions for more transactions. Closing a session simply "resets" it back to an empty state so I can be sure all SQLAlchemy ORM mapped classes are deleted from the session. It is good practice to close sessions after a transaction is completed.
To reset the current session, run the following code:
session.close()
Update records in the database
There are two ways to use the SQLAlchemy ORM to update database records. I may either:
- Use the select() function to select a record from the database, modify its attributes, then commit it back to the database
- Use the ORM-enabled update() function
Both methods are valid and readers may prefer one or the other depending on what they are trying to accomplish. For example, the update() function may be usefule for bulk updates.
Update object returned by select() function
In the following example, I will use the select() function. I think that, in most of my programs, I will select a row, or rows, to be updated; make the changes required to each row; and then commit the rows back to the database.
For example, to update the data for user "Brad", I ran the following code:
id = "Brad"
brad = session.execute(
    select(Userdata).where(Userdata.user_id == id)
    ).scalar()
if brad:
    brad.user_data = "Changed data"
    session.commit()
else:
    print(f"User '{id}' does not exist")
session.close()
This code checks if the row to be modified actually exists before modifying it.
Now I can see, in the SQLite Viewer web app, that the user_data column for the "Brad" row has been changed:
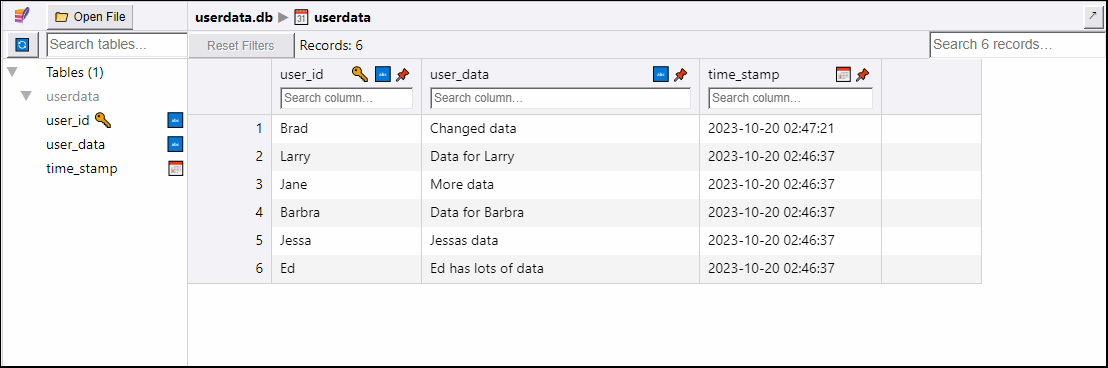
I see that the time_stamp column is also updated with a new value that reflects when the row was updated. See the SQL functions I defined in that column for more details about how that works.
Use the update() function
In the next example, I will use the update() function to modify data in a database table. I changed Brad's data again by executing the SQL statement returned by the update() function with a where() clause.
session.execute(
    update(Userdata)
    .where(Userdata.user_id == "Brad")
    .values(user_data="Changed again")
)
session.commit()
session.close()
When I check the SQLite Viewer web app again, I see that the user_data column for "Brad" is changed again and so is the time stamp.
To check if the row exists before I execute the update function, I would execute a select() function and test whether it returned a single result before executing the update function. While this looks like it is more complex in Python, it actually results in the same SQL commands being sent to the database as the select() example, above.
Here is the complete code, including the check for an existing record:
id = "Brad"
brad = session.execute(
    select(Userdata).where(Userdata.user_id == id)
    ).scalar()
if brad:
    session.execute(
        update(Userdata)
        .where(Userdata.user_id == id)
        .values(user_data="Changed again")
    )
    session.commit()
else:
    print(f"User '{id}' does not exist")
session.close()
Bulk updates
According to the SQLAlchemy ORM documentation, one may prefer using the update() function for bulk updates because it generates one SQL statement for all the updates, which may result in faster performance compared to using the select() function, which generates multiple SQL statements: one per updated item.
To change the data in one column for all rows in a table, run the following code:
session.execute(
    update(Userdata)
    .values(user_data="Mass update")
)
session.commit()
To change data in a group of rows, identified by primary key, run the following code:
change_list = [{"user_id": "Brad", "user_data": "bulk data for Brad"},
               {"user_id": "Larry", "user_data": "Larry's  bulk data"}]

session.execute(update(Userdata), change_list)
session.commit()
Deleting rows from a table
I can delete rows in a similar way that I update rows. I can use two different methods:
- Select a row from the database and add it to the list of items to be deleted when the session is committed
- Execute the delete() function and commit the change
Selecting and deleting rows
To select a row, I executed the select() function and use the where() method to choose the user. In this case, I matched the primary key, user_id with the name "Brad". I used the returned row object to delete the row in the database.
brad = session.execute(
    select(Userdata).where(Userdata.user_id == "Brad")
    ).scalar()

session.delete(brad)
session.commit()
session.close()
The session also has a delete_all() method that can delete multiple rows. The objects to be deleted must be provided in a list. For example:
brad = session.execute(
    select(Userdata).where(Userdata.user_id == "Brad")
    ).scalar()
larry = session.execute(
    select(Userdata).where(Userdata.user_id == "Larry")
    ).scalar()

session.delete_all([brad, larry])
In this case, I don't want to commit the delete so I will roll back the changes:
session.rollback()
session.close()
The session's rollback() method discards all transactions in the current session so nothing was deleted from the database.
Using the delete() function
The delete() function with a where() method can be used to delete rows that match a selected criteria. In this case, I deleted the user named "Larry" from the database:
from sqlalchemy import delete

session.execute(delete(Userdata).where(Userdata.user_id == "Larry"))
session.commit()
session.close()
If I wanted to delete multiple rows, I would use a where() clause that matches multiple rows, like:
session.execute(delete(Userdata).where(Userdata.user_data == "Mass update"))
Again, I don't want to delete all these rows so I will roll back the transaction:
session.rollback()
session.close()
Improve printing ORM Mapping Classes
In all the examples above, I had to specify the columns of each row when printing returned results. if I do not specify the columns, a print statement simply prints Row object ID. For example:
stmt = select(Userdata)
results = session.execute(stmt).scalars()
for x in results:
    print(x)
The above code prints the following results:
<__main__.Userdata object at 0x0000018D31BF2650>
<__main__.Userdata object at 0x0000018D32980790>
<__main__.Userdata object at 0x0000018D32982CD0>
<__main__.Userdata object at 0x0000018D32983350>
<__main__.Userdata object at 0x0000018D32983390>
The data we want to see will only be printed if we specify each Userdata object's columns, as shown below:
for x in results:
    print(x.user_id, x.user_data, x.time_stamp)
Which give the following output:
Brad bulk data for Brad 2023-10-20 02:47:30
Jane Mass update 2023-10-20 02:46:30
Barbra Mass update 2023-10-20 02:46:30
Jessa Mass update 2023-10-20 02:46:30
Ed Mass update 2023-10-20 02:46:30
I want to print out the data in the nicely formatted string, with the column names. I can create a separate function to do this, or I can build that functionality into the ORM Mapped Class by overloading its __repr__() method. For example, if I re-define the __repr__() method as shown below, printing a Userdata object will print the data I want, instead of just the object ID.
class Userdata(Base):
    __tablename__ = "userdata"
    __table_args__ = {'extend_existing': True}  # To allow in-place
                                                # change to class
    user_id = mapped_column(String(32), primary_key=True, nullable=False)
    user_data = mapped_column(String(640))
    time_stamp = mapped_column(DateTime(), default=func.now(), onupdate=func.now())

    def __repr__(self):
        return f"user_id={self.user_id:8}" \
               f"user_data={self.user_data:22}" \
               f"time_stamp={self.time_stamp.strftime('%B %d %H:%M')}"
Now, whenever I print a Userdata object, I will see the data from the object. For example, run the following code to select and print each row:
stmt = select(Userdata)
results = session.execute(stmt).scalars()
for x in results:
    print(x)
The result is shown below. Previously, the same code just printed the Userdata object IDs. Now, it prints the data from each row.
user_id=Brad    user_data=bulk data for Brad   time_stamp=October 20 02:47
user_id=Jane    user_data=Mass update          time_stamp=October 20 02:46
user_id=Barbra  user_data=Mass update          time_stamp=October 20 02:46
user_id=Jessa   user_data=Mass update          time_stamp=October 20 02:46
user_id=Ed      user_data=Mass update          time_stamp=October 20 02:46
Conclusion
I created a simple database table using SQLAlchemy ORM mapped classes and performed database transactions with the table. The next step is to integrate what I have learned into a real program. I intend to update my usermapper-web application and use a database to store user data.
-
Most database drivers require that the database already exists, but SQLite lets me start with no database. ↩
-
One may ask, "Why create Base and not just subclass DeclarativeBase in my table classes?" Because, in more advanced database applications, the Base class can be configured with custom metadata and other attributes that could be inherited by all other database subclasses. Also, because SQLAlchemy simply does not allow it; one must create and use a subclass of the DeclarativeBase class. ↩
-
In some other tutorials, readers may have seen the attributes defined differently, using Python type hints and the ORM's Mapped class. I am not yet using type hints in my Python programs so I exclusively used the SQLAlchemy ORM mapped_column() function to define each column. ↩